Water stains near a fireplace, damp drywall beside a chimney, or moisture appearing after heavy rain may indicate a roof flashing leak around chimney. The problem often develops where the roofing materials meet the chimney, allowing water to enter through damaged or improperly installed flashing.
Chimney flashing is designed to protect one of the most vulnerable transitions in a roofing system. Unlike a plumbing vent pipe, which typically uses a specialized boot, a masonry chimney requires several flashing components that work together to direct water away from the roof opening.
When these components become loose, corroded, incorrectly overlapped, or separated from the masonry, rainwater can reach the roof decking and interior building materials.
For homeowners in Greentown, Hawley, Tafton, and communities around Lake Wallenpaupack, heavy rainfall, winter conditions, and seasonal temperature changes can expose weaknesses in aging chimney flashing.
Understanding how chimney flashing works, identifying where it fails, and recognizing when repairs are necessary can help prevent moisture damage without assuming the entire roof needs replacement.
What Is Chimney Flashing and How Does It Prevent Roof Leaks?
Chimney flashing is a system of metal components installed where a chimney passes through the roof. Its purpose is to direct rainwater over the roofing materials and away from the opening between the chimney and the surrounding roof structure.
Unlike a simple surface seal, properly installed chimney flashing relies on overlapping materials that guide water downward using gravity.
A typical chimney flashing assembly on an asphalt shingle roof includes several important components.
Step Flashing
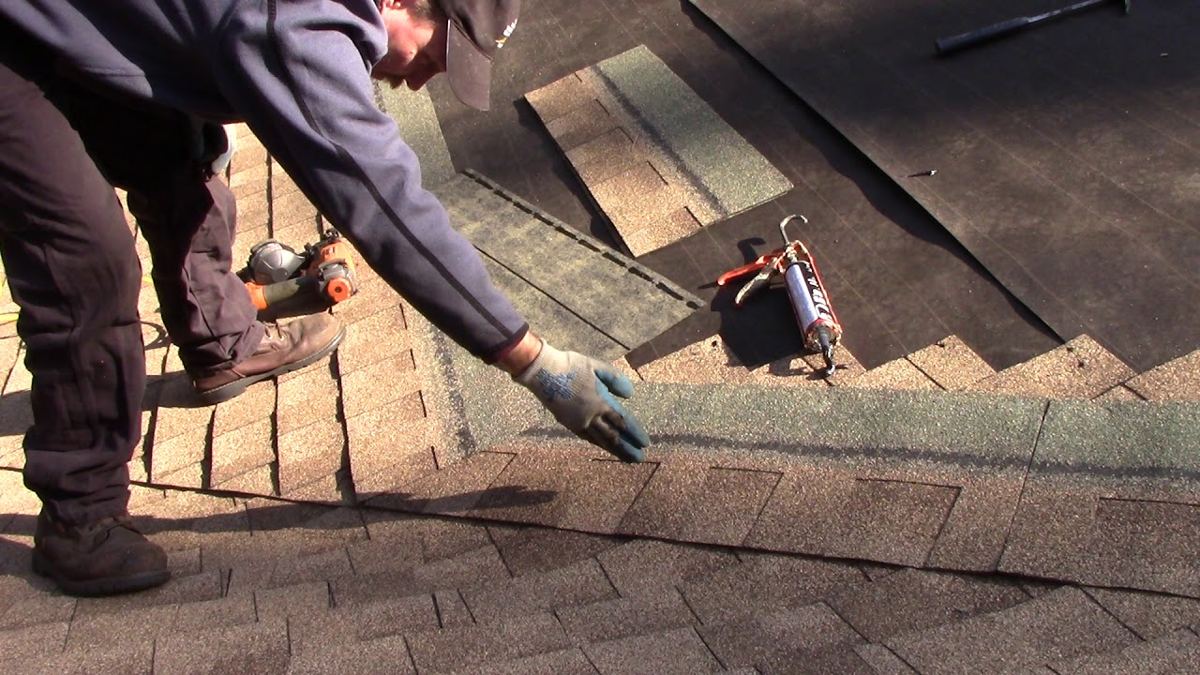
Step flashing consists of individual L-shaped metal pieces installed along the sides of the chimney. Each piece overlaps with the roofing shingles to direct water down the roof surface.
Properly installed step flashing moves water away from the chimney-to-roof joint instead of allowing it to pass beneath the shingles.
Counter Flashing
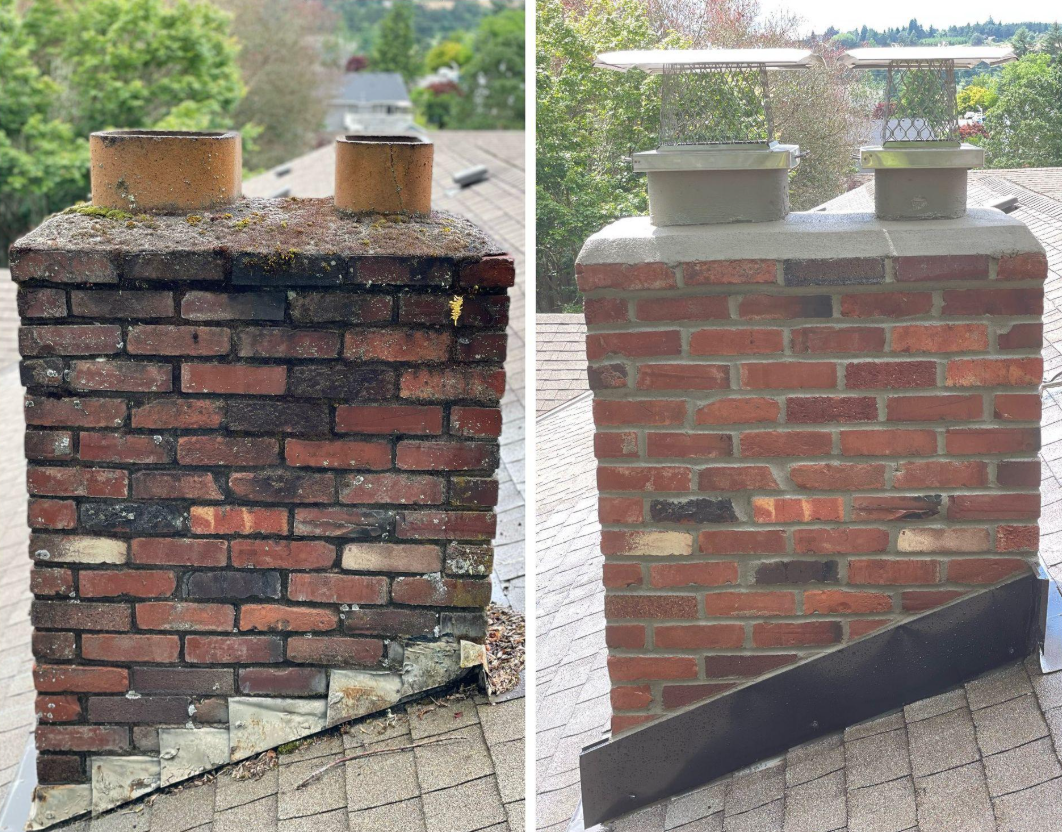
Counter flashing covers the upper portions of the step flashing and helps prevent water running down the chimney masonry from entering behind it.
On many masonry chimneys, counter flashing is secured into a reglet or mortar joint and overlaps the underlying flashing.
If this connection becomes loose or improperly sealed, moisture can enter between the chimney and the roofing materials.
Front Apron Flashing
Apron flashing is installed along the downslope side of the chimney, where water needs to transition from the chimney face back onto the roof surface.
Its installation must allow water to drain over the shingles rather than underneath them.
Back Pan Flashing and Chimney Crickets
The upslope side of a chimney requires particular attention because water flows toward it from higher roof areas.
A back pan or appropriately designed flashing arrangement helps manage water behind the chimney.
Wider chimneys may also require a chimney cricket, sometimes called a saddle, which redirects water toward the sides instead of allowing it to collect behind the masonry.
When these components work together correctly, they create a layered water-shedding system. A roof flashing leak around chimney can develop when one or more components fail to maintain that protection.
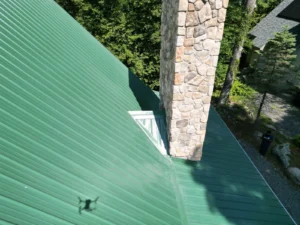
7 Warning Signs of a Chimney Flashing Leak
Chimney roof leaks do not always appear directly beside the chimney. Water can travel along roof decking, rafters, or interior framing before becoming visible.
The following symptoms may indicate a problem with the flashing assembly.
1. Water Stains on Ceilings Near the Chimney
Brown or yellow stains on ceilings or walls surrounding a chimney are common signs of moisture intrusion.
If the stains become more noticeable after rain, damaged flashing may be allowing water into the roof assembly.
However, stains alone do not confirm the source because water can also enter through the chimney crown, masonry joints, or roofing materials farther uphill.
2. Damp Drywall or Peeling Paint
Water entering near chimney flashing may affect nearby drywall and interior finishes.
Peeling paint, bubbling surfaces, or recurring damp spots can indicate moisture traveling through the wall or ceiling cavity.
3. Loose or Separated Counter Flashing
Counter flashing should remain properly secured to the chimney and overlap the underlying flashing.
Visible gaps, loose metal edges, or separation along mortar joints may indicate that the flashing connection is no longer functioning correctly.
4. Rust or Corrosion Around Flashing Components
Metal flashing can deteriorate over time, particularly where protective finishes have been damaged.
Rust, corrosion, holes, or weakened flashing edges may compromise the system’s ability to redirect rainwater.
Not every stain on flashing indicates failure, but extensive deterioration requires closer inspection.
5. Missing or Damaged Shingles Around the Chimney
Cracked, lifted, or missing shingles can interrupt the overlapping drainage system surrounding chimney flashing.
Even when the metal flashing appears intact, damaged shingles may expose areas where water can enter beneath the roof covering.
6. Water Appearing During Wind-Driven Rain
A chimney flashing leak may become more noticeable during storms that push rainwater against vertical chimney surfaces.
Wind-driven rain can expose gaps around counter flashing or improperly integrated roofing materials that may not leak during lighter rainfall.
7. Repeated Leaks After Previous Patching
If a chimney leak returns after sealant or roofing cement has been applied, the underlying flashing problem may not have been corrected.
Repeated water intrusion may indicate improper overlaps, loose metal components, or moisture entering from another part of the chimney.
These warning signs should be investigated before further interior damage develops.
What Causes Roof Flashing Leaks Around Chimneys?
Several conditions can cause chimney flashing to lose its ability to protect the roof opening. Identifying the specific failure is essential because different problems require different repairs.
Improper Step Flashing Installation
A step flashing leak may develop when individual flashing pieces are missing, incorrectly overlapped, or poorly integrated with the shingles.
Step flashing is intended to direct water onto the next overlapping roofing surface. If the installation allows water to flow behind the metal, moisture may reach the underlying roof materials.
This problem can occur when flashing is reused incorrectly during roofing work or when shortcuts are taken around the chimney.
Counter Flashing Separation
Counter flashing may loosen when mortar joints deteriorate, attachment details fail, or movement causes separation.
A gap between the counter flashing and masonry can allow rainwater to travel behind the flashing system.
Surface-mounted components that depend excessively on exposed sealant may be particularly vulnerable when the joint deteriorates.
Aging or Corroded Flashing
Metal flashing may become damaged through corrosion, physical impact, or repeated exposure to weather.
The condition of the metal, its compatibility with surrounding materials, and the quality of its installation all affect long-term performance.
Poor Water Drainage Behind the Chimney
A large chimney can interrupt the natural flow of rainwater down a sloped roof.
If the upslope flashing arrangement does not direct water away effectively, debris and moisture may accumulate behind the chimney.
This increases exposure around flashing seams and may contribute to recurring leaks.
Deteriorated Mortar Joints
The connection between counter flashing and chimney masonry may be affected when mortar becomes cracked or loose.
Moisture can enter through the joint and travel behind the flashing, particularly during heavy or wind-driven rain.
In some situations, damaged mortar also allows water to enter the chimney structure independently of the roofing system.
Previous Repairs That Covered Rather Than Corrected the Problem
Thick roofing cement or repeated layers of sealant can conceal damaged flashing without restoring the required overlaps.
Although certain sealants are appropriate for specific flashing joints, coating the exterior of a failed assembly is not a substitute for correcting its underlying construction.
How to Tell Whether the Leak Comes From Chimney Flashing or Masonry
One of the most important parts of diagnosing a leaking roof around chimney structures is determining whether water enters through the flashing system or another chimney component.
A moisture stain beside the chimney does not automatically mean the flashing has failed.
| Observed Problem | Possible Source | What Should Be Checked |
| Water appears near the chimney after rain | Step or counter flashing | Flashing overlaps, attachments, and nearby shingles |
| Moisture runs down the interior chimney surface | Crown, cap, or masonry | Chimney top and exposed masonry condition |
| Water collects behind a wide chimney | Drainage or back-pan flashing | Debris buildup, cricket design, and water pathways |
| Dampness appears after wind-driven rain | Flashing or masonry openings | Counter flashing joints and masonry defects |
| Leak continues after applying roof cement | Unresolved flashing defect | Full flashing assembly and adjacent roofing materials |
| Water appears some distance from the chimney | Water traveling beneath the roof covering | Attic staining, roof decking, and possible uphill entry points |
Why Leak Location Can Be Misleading
Water entering through an opening above the chimney can travel along the underside of the roof decking before dripping near the fireplace.
Likewise, water entering through damaged chimney masonry may appear inside the house even when the roofing flashing is functioning correctly.
A professional assessment should evaluate the suspected entry point and the surrounding components rather than relying only on the location of interior staining.
Homeowners can document visible water stains, rainfall timing, and changes in interior moisture from safe locations. Roof access and controlled diagnostic testing should be left to qualified professionals.
For a broader assessment of the roof’s condition, consider professional roof inspection and maintenance services.
Chimney Flashing Repair vs. Replacement: What Is the Right Solution?
The appropriate chimney flashing repair depends on the extent of the damage, the condition of the metal, and whether the existing installation is properly integrated with the roofing materials.
When a Localized Flashing Repair May Be Appropriate
A targeted repair may be possible when the damage is limited to an identifiable component and the surrounding flashing remains in good condition.
For example, an appropriately designed and otherwise sound flashing assembly may require correction of a specific joint or replacement of a damaged metal section.
However, the repair must restore the flashing’s water-shedding function rather than merely hide the visible opening.
When Complete Chimney Reflashing May Be Necessary
Replacing the flashing assembly may be more appropriate when:
- Step flashing is missing or incorrectly installed.
- Counter flashing has extensive damage or separation.
- Metal components show significant corrosion.
- Flashing overlaps cannot be corrected reliably through a limited repair.
- Previous patching has concealed extensive defects.
- Surrounding shingles must be removed to restore the proper flashing arrangement.
- Water continues entering after previous repairs.
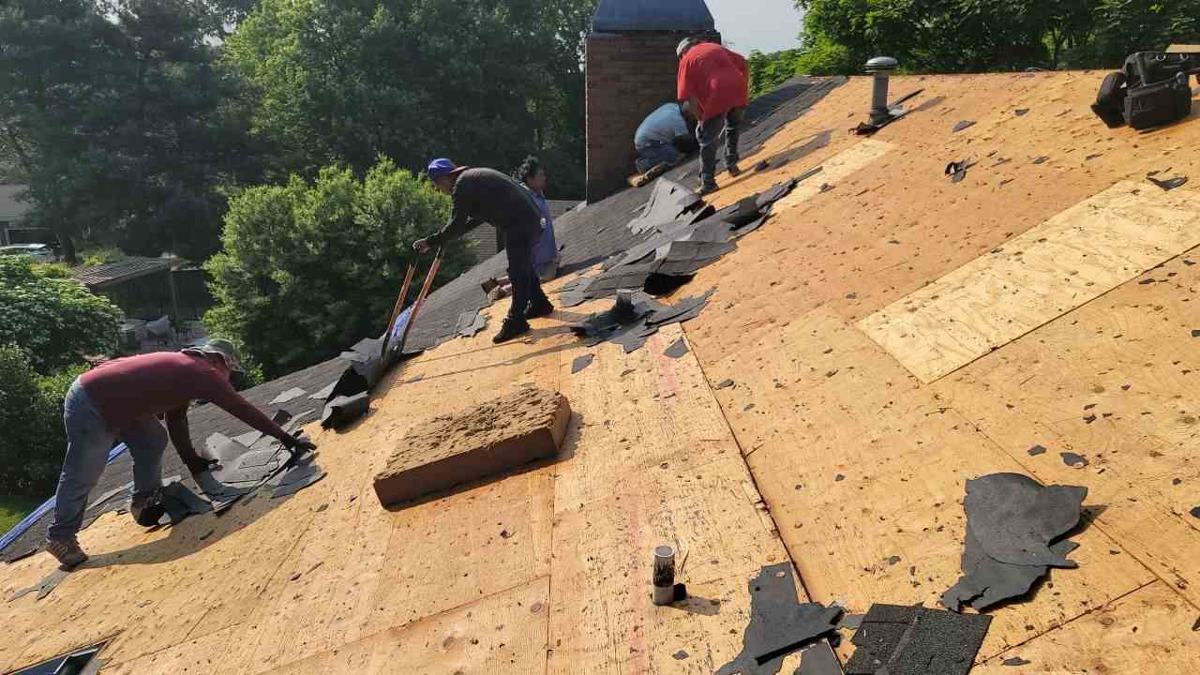
Complete reflashing may involve carefully removing roofing materials around the chimney, evaluating the exposed components, and installing compatible flashing according to the roof system and chimney construction.
Where mortar joints are damaged, coordination with a qualified masonry professional may also be necessary.
Does a Chimney Flashing Leak Mean the Entire Roof Needs Replacement?
Not necessarily. A localized flashing problem can sometimes be corrected while preserving the surrounding roof.
The decision depends on the condition of the roofing materials, the extent of moisture damage, and whether the flashing can be integrated into a serviceable roof covering.
Wallenpaupack Roofers provides roof repair services for damaged flashing and other roofing concerns in Greentown and surrounding Northeast Pennsylvania communities.
Why Roofing Cement and Caulk Are Not Always Reliable Chimney Leak Repairs
One common mistake when dealing with damaged chimney flashing is applying roofing cement over every visible gap.
While compatible sealants can be appropriate for certain designed joints, they cannot replace missing step flashing, correct improper water-shedding overlaps, or repair severely corroded metal.
A thick application of roofing cement may temporarily reduce visible water entry while leaving underlying installation defects unresolved.
As roofing materials and masonry experience movement and temperature changes, surface patches may separate and allow moisture to return.
A durable solution starts by identifying which flashing component has failed and correcting that part of the assembly.
If a chimney continues leaking after multiple patches, a more detailed inspection of the complete flashing system is generally more useful than another surface application.
What Happens If Damaged Chimney Flashing Is Ignored?
A chimney flashing leak can allow moisture to reach areas beneath the roof covering.
The consequences depend on the amount of water entering, the duration of exposure, and the condition of the surrounding building materials.
Roof Decking Damage
Repeated moisture intrusion may contribute to staining, swelling, or deterioration of wood roof sheathing near the chimney.
Interior Wall and Ceiling Damage
Water entering through the chimney-to-roof connection can damage drywall, ceiling finishes, paint, and nearby interior surfaces.
Wet Insulation
Moisture can saturate insulation around the chimney opening and reduce its effectiveness.
Mold and Persistent Dampness
Areas that remain damp may develop musty odors and conditions favorable to microbial growth.
Expanding Repair Needs
A flashing problem that initially affects a small area may require additional work if water damages nearby shingles, decking, or interior finishes.
Addressing the leak source promptly can help limit unnecessary damage.
How to Help Prevent Chimney Flashing Leaks
Preventing flashing-related moisture problems starts with maintaining the roof-to-chimney connection and identifying deterioration before it becomes severe.
Include Chimney Flashing in Roof Inspections
Ask a qualified roofing professional to examine counter flashing, step flashing, visible metal connections, and surrounding shingles during routine roof inspections.
Check for Debris Behind the Chimney
Leaves and other debris can accumulate on the upslope side of a chimney and interfere with drainage.
Where appropriate, a professional should evaluate whether the existing drainage arrangement adequately redirects water around the chimney.
Watch for Loose Flashing and Mortar Damage
Visible metal separation or deteriorating mortar joints should be assessed before repeated rainfall creates more significant moisture problems.
Review Flashing During Roof Replacement
When roofing materials around the chimney are replaced, the existing flashing should be evaluated rather than automatically reused.
Its condition and compatibility with the new roofing system determine whether replacement or modification is appropriate.
Avoid Unsafe Roof Inspections
Homeowners should avoid climbing onto steep, wet, icy, or damaged roofs to examine chimney flashing.
Observations from the ground, accessible windows, or safe interior locations are useful, while detailed roof inspections should be handled by qualified professionals.
Chimney Flashing Leaks in Greentown and Lake Wallenpaupack, PA
Homes in Greentown, Hawley, Tafton, Lakeville, and the Lake Wallenpaupack area experience changing weather conditions throughout the year.
Heavy rain, snow accumulation, freezing temperatures, and seasonal temperature changes can expose weaknesses in older chimney flashing assemblies.
For homes with masonry chimneys, maintaining the connection between the chimney and roofing materials is especially important because the two structures may respond differently to temperature changes and movement.
A roof flashing leak around chimney should be assessed based on the condition of the flashing, masonry, nearby shingles, and water drainage rather than assuming the entire roof requires replacement.
A targeted assessment can help identify whether the issue involves step flashing, counter flashing, back-pan drainage, or a separate chimney defect.
Chimney Flashing Leaking? Contact Wallenpaupack Roofers
If you notice water stains near your chimney, loose metal flashing, or recurring moisture after rainfall, arranging a professional assessment can help identify the actual source of the problem.
Wallenpaupack Roofers provides roofing repair services in Greentown, PA, and surrounding communities near Lake Wallenpaupack.
Our team can evaluate damaged chimney flashing, surrounding shingles, and visible roofing defects to help determine the appropriate repair.
Whether your roof needs a targeted flashing correction or more extensive work around the chimney, identifying the source of water intrusion is the first step toward a reliable solution.
Call Wallenpaupack Roofers at (570) 390-3166 or request professional roof repair assistance to discuss your chimney flashing concern.
Frequently Asked Questions About Chimney Flashing Leaks
What are the most common signs of a chimney flashing leak?
Common signs include water stains near the chimney, loose counter flashing, damaged shingles, visible metal deterioration, and recurring moisture after rainfall. An inspection is needed to confirm whether flashing is the actual entry point.
Can chimney flashing leak even if the shingles look fine?
Yes. Counter flashing can separate from masonry, or concealed step flashing may be damaged even when the surrounding shingles appear intact from the ground.
What causes a step flashing leak around a chimney?
A step flashing leak can result from missing metal pieces, incorrect overlaps, damaged shingles, or improper installation that allows water to move beneath the roofing materials.
Can damaged chimney flashing be repaired without replacing the roof?
Often, yes. If the surrounding roof remains in good condition, localized flashing repairs or complete chimney reflashing may resolve the moisture problem without replacing the entire roofing system.
Why does my chimney leak only during heavy rain?
Heavy or wind-driven rain may expose gaps around flashing joints or other chimney components that do not admit noticeable water during lighter rainfall. The exact source should be investigated rather than assumed.
Is roofing cement enough to fix a chimney flashing leak?
Not always. Sealant may be appropriate for particular flashing details, but it cannot correct missing metal components, severely damaged flashing, or improperly installed overlaps.
Who should inspect a leaking chimney in Greentown, PA?
A qualified roofing contractor can inspect the flashing and surrounding roofing materials. If the leak involves masonry, the chimney crown, or other chimney components, a qualified chimney or masonry specialist may also be needed.